![]()
|
Contents:
Cookery links:
|
Cooking skill level 1: Quite Frankly Rubbish ii. Toast
Instructions Now that you have mastered making a glass of water, you are probably getting a bit peckish. Now is therefore the perfect time to make yourself a piece of toast (or two if it has really taken it out of you!). Toast is a staple dietary item in this country - the culinary backbone of British society. It got us through two world wars, and it will get you through the day (until the next meal, that is).
There are many different serving suggestions possible with toast as it is truly one of the most flexible food known to man (and several species on surrounding planetary bodies in the immediate universe area). We concentrate on the basics at first, but there are several "fancy toppings" described for your enjoyment.
Step 1 - obtain bread and prepare toaster The key ingredient in making toast is bread. Really, the bread should be fresh, although slightly stale is also acceptable in some working class areas. It is important that the bread is not mouldy. The best way to avoid this is to look carefully over the surface of BOTH sides of each piece of bread you plan to use - any sign of green means the bread is mouldy and you should discard immediately.
The bread can be white or brown (or wholemeal as it is sometimes known) - the particular type you choose is a matter of preference. If you prefer it lacking in flavour, nutrition and substance then choose white. If you have any sense of class or taste then we would recommend that you go for a fine malted wholemeal loaf.
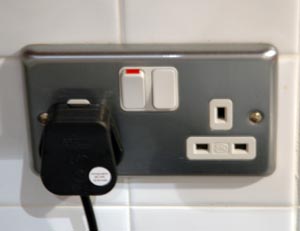
The key utensil in making toast is a toaster. Aficionados of toast-making will likely point out here that a grill is a perfectly acceptable alternative, and even an open fire can be used when in the great outdoors, but, for classic simplicity, you cannot beat a toaster. Ensure that the toaster plug is connected to the socket on the wall, and that the socket is switched on. This should guarantee a working toaster. If not, it's probably best that you call an electrician.
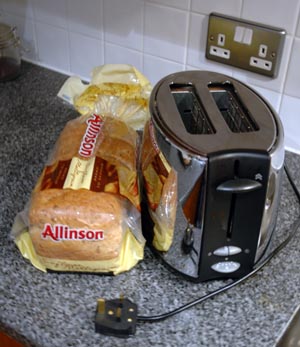
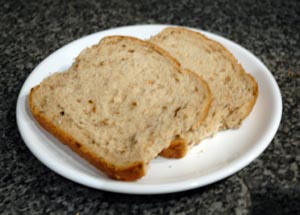
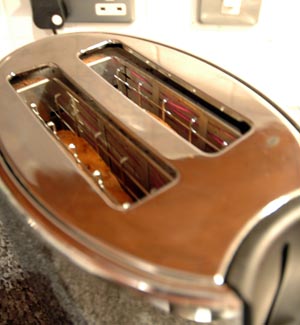
Fig 1 shows the bread (here some Allison's sunflower multigrain - whatever that is) and toaster (unplugged). Fig 2 provides a better look at the bread to be toasted, with fig 3 displaying the plugged in plug (into the plug socket) of the toaster.
Step 2 - toast the bread Take one (or two) slices of bread and place into the bread-shaped apertures on the top of the toaster. Each toaster is unique, but generally the act of setting the toaster to 'toast' involves the movement downwards of some sort of lever. If the bread sinks into the toaster and stays there, and the filaments inside the toaster start to glow orange, then the toasting is being done. If not, consult the toaster instruction manual, or try switching the toaster off-and-on-again.
Most modern toasters come with a timing setting, although it is impossible to specify what is right for you, as it depends on the make of toaster, the thickness of the bread, and your preferred level of toastedness. Most sane people's idea of good toast is when it is golden brown. To this end, you can monitor closely the colour of the bread/toast (although do not, for goodness sake, put your nose inside the toaster when monitoring closely) and, if necessary, "pop up" the toast to check its colour (there is usually a button for this, or else it is a reversal of the lever's motion which put the bread in there in the first place).
If the worst scenario occurs and the toast burns, and it has happened to the best of us (when juggling a hectic schedule, or falling asleep), open a window, discard the bread and hope and pray that the smoke alarm does not go off - then go back to step 1. However, assuming that you have successfully followed the instructions for producing golden brown toast, proceed to step 3.
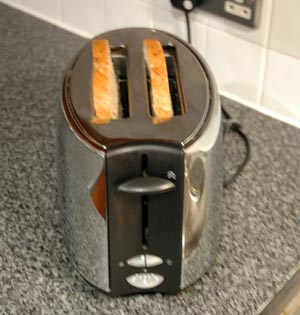
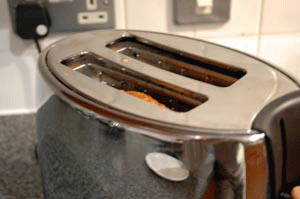
Fig 4 - the bread about to be lowered into the cooking inferno that is the toaster, fig 5 - the toast is toasting nicely and fig 6 - the popping up of the toast (a religious process in some counties).
Step 3 - put topping on top of toast The classic accompaniment to toast is butter, or, if you are feeling healthy, margarine. The phrase "hot buttered toast" didn't come about for nothing. Take a knife and coat it with the butter or margarine (preferably at room temperature). Then transfer the butter or margarine to the toast. Make sure to cover all the visible surface of the toast with the butter or margarine (but only on one side). The butter or margarine should melt. If you have two pieces and wish to keep the toast warm and the butter or margarine molten, then place the two pieces on top of one other, with the buttered or margarined side inwards.
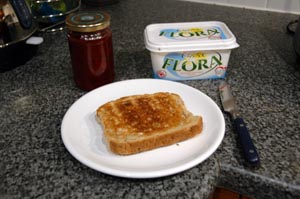
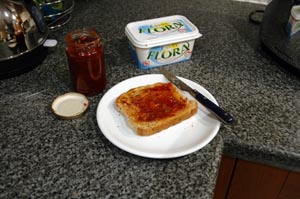
Fig 7 above shows one piece of toast fresh out of the toaster with potential toppings, Flora Light margarine and some home-made jam, with fig 8 showing the buttered (or margarined) toast.
Some people are not satisfied with just butter or margarine on the toast, and go for extra toppings in addition to the butter or margarine. Examples of this are: jam, marmalade, cream cheese, marmite, chocolate spread (although lord knows why), and peanut butter (see chocolate spread).
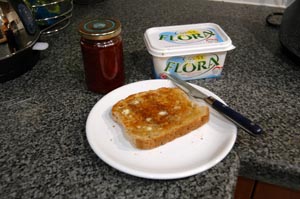
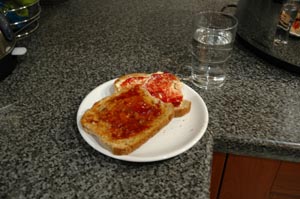
Fig 9 shows the toast with the jam spread neatly across, and fig 10 displays the two slices of jam-and-margarine coated toast ready for eating, served with the glass of water displayed earlier.
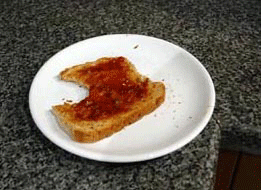
The joy of food, they say, is in the eating, and so fig 11 above shows this in all its glory. We hope you enjoyed this lesson. |
Utensils required Toaster Plate Knife
Ingredients Bread (fresh, sliced) Butter or margarine Cream cheese (optional) Jam (optional) Marmite (optional)
Serves 1
Preparation time 1 minute
Cooking time 5 minutes
|